Macro Photography – Exposure Triangle
The exposure triangle is a tool that is commonly used to help us understand the different factors that affect a photo’s exposure. As you can see from the diagram below, there are three factors (Shutter speed, Aperture and ISO) that will influence the exposure of your photo –
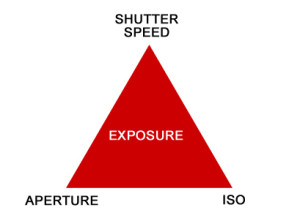
Exposure Triangle – 1) Shutter Speed, 2) Aperture & 3) ISO
1. Aperture
The aperture is the size of your lens opening on your camera’s lens. The aperture controls the amount of light entering your lens. It is often depicted by f-number. The lower the f-number the larger the lens opening. For example, f2.8 will allow more light through your lens than say f8.

2. Shutter speed
Shutter speed refers to how long the lens opening is kept open for. As you may have already worked out, the longer the shutter speed, the more light is allowed through your lens. The shorter the shutter speed, the less light is allowed through your lens.
3. ISO
ISO refers to the sensitivity of the camera’s sensor to light. When the ISO setting is high, the camera’s sensor will be more sensitive to light. This will have the effect of making your photos appear brighter. There are some drawbacks with higher ISO levels but we will save that discussion for another day.
Another Way To Think About The Three Factors
One way to think about the three factors of exposure is to think about a room in your house that has a window. This window allows the sunlight to enter into the room. You can control the amount of light that goes through the window by adjusting the window curtains. Close the curtains a little and less light will enter through the window and into the room. Open the curtains back up and more light will enter through the window again. This is essentially your aperture. Secondly, shuttle speed refers to how long you let the light in through the window. Think of this as how long you leave your window curtains open before you completely close the curtains. The longer you leave the curtains open, the greater the duration for the light to go through the window. Lastly, imagine that within this room, you also have one of those fancy controllable/dimmable lights. When you turn on the light and you slowly adjust the light in the room to be brighter, this is in effect the same as you increasing your ISO. If you then start dimming the light in the room, then this has the same effect as decreasing your ISO.
Why Is This Important?
If you are shooting in Auto or in another Pre-set camera mode (eg. Shutter mode – S, Aperture mode- A, etc), your camera typically does a fairly good job at determining the right exposure balance. However to achieve a proper exposure in Manual mode, you will need to find the right balance between your Aperture, Shutter speed and ISO settings. Ultimately this will also give you greater control over your camera and provides you with the flexibility that you sometimes require in order to achieve the right effect for your photo. One thing to note is that a proper exposure can be achieved by using a number of different combinations of the 3 factors. For example, here are two photos (with different settings) that we took of ‘Ribbit The Frog’. Look at how similar and identical they are despite the different camera settings used –
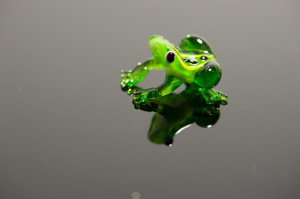
Aperture f9.0, Shutter speed 1/4s & ISO 200
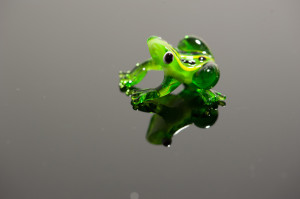
Aperture f9.0, Shutter speed 1/25s & ISO 1250
We hope that this post has provided you with a good introduction to the factors in the exposure triangle. Check out this video by Evan Sharboneau to see awesome live examples of how shutter speed, aperture and ISO affects your photos –