Macro Photography – How To Compose Your Photos Like A Pro
Before we start, try to recall the best ever photo or picture that you have seen in your life. Once you have an image of it in your head, ask yourself why this photo is so impressive? If you were able to name a few reasons, then you are definitely one step ahead of the game. If you were unable to list any reasons, don’t be too down – it is often quite hard to determine what makes a good photo. Sometimes it just boils down to a ‘feeling’ that you get when you look at the photo.
However, rather than basing your next composition on just a ‘feeling’ we are going to cover off some basic rules which you can use when you are composing your next macro photography photo. Let’s have look at some of these –
Macro Photography How To Compose Tip #1 – The Rule of Thirds
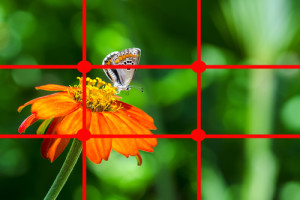
Macro Photography How To Tip #1 – Divide your viewfinder into thirds to determine focus points
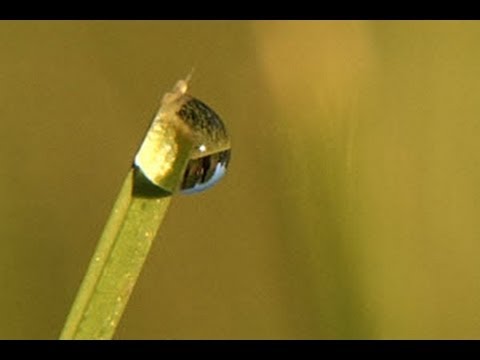
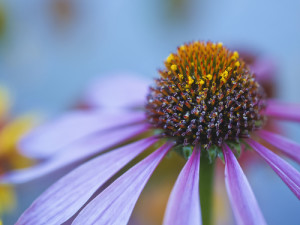
The rule of thirds is a technique that can be applied in macro photography. It propose that you split your frame into nine separate areas by imagining two equally spaced vertical and two horizontal lines across your image.
To maximize the impact of your photos, your subject or your area of interest should always be placed onto one of the intersecting points. These points create tension, energy and interest in the composition and research has shown that the human eyes are naturally drawn to these intersecting points.
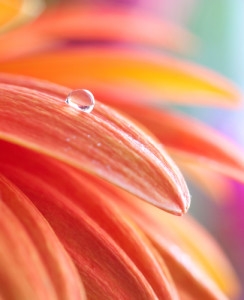
Water drop on the focus point of the frame
By following the rule of thirds, you will avoid placing your subject or area of interest in the middle of the frame. The only exception to this rule is when you are planning to crop your image into a square frame – in this scenario, your subject or area of interest can be placed in the middle.
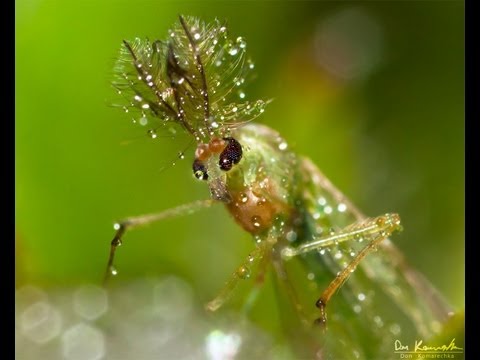
It is important to know that the rule of thirds is only a guideline. Many professionals have sometimes broken the rules and still end up with a nicely composed photos. For example, an extreme close up of a bug’s eyes.
Macro Photography How To Compose Tip #2 – Clean Background
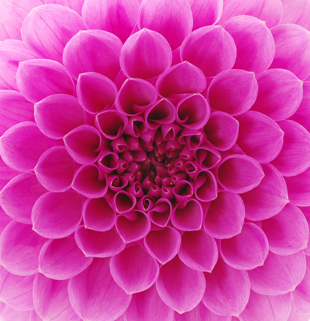
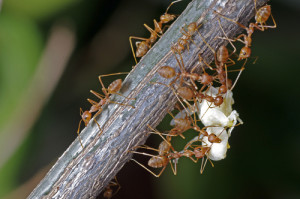
Macro Photography How To Tip #2 – Before you take your photo check for any distractions in the background
Before you take your photo, there are a number of things that you should check. You will need to ensure that the background of your image does not contain any objects that might distract someone from your subject of interest. This commonly includes a branch/stick or another flower that is in the background of your photo. For situations like this, you may wish to remove these objects before you take your photo. If you are unable to remove the object, you should try shooting from another angle to hide the distracting object.
To make your object as the focus of attention, your background should be somewhat out of focus / blurry. To achieve this, you need to ensure that you have a shallow depth of field. So you should use a fairly wide aperture when taking your photo. Eg. f2.8. This will ensure that you have a clean and subtle background. This will ultimately make your subject pop out of your photos.
Macro Photography How To Compose Tip #3 – A Unique Perspective
Macro Photography How To Tip #3 – A unique viewpoint draws your viewers in.
Taking your photos from a unique viewpoint is another macro photography technique that you should try to use more often.
Imagine yourself admiring the flowers in your garden. When you are looking at these flowers, you are always looking from a top-down perspective. As such, if you take a photo from the same viewpoint, it is not unique and doesn’t captivate the attention of your viewers.
By making a minor adjustment and getting down to the level of your subject, you provide a different perspective to your viewer – one which that they are not used to seeing. This helps to capture the attention of your viewers and draw them into the macro photography world.
Macro Photography How To Compose Tip #4 – Using Diagonal Lines
Macro Photography How To Tip #4 – Minimize exit points at the corners of your photos
When there are straight ‘lines’ (eg. a branch, horizontal or vertical texture) going through your photos, there is a simple macro photography tip that you can follow to enhance your photo. Rather than keeping those lines as vertical or horizontal, consider shifting or rotating your camera slightly so that these lines run diagonally across your frame. This minor adjustment can usually make a big difference between a good photo and a brilliant photo.
Additionally, try to avoid having these ‘lines’ come out from the corners of your photos. It is usually more balanced and more aesthetically pleasing to the eye if the lines exit the frame just below or above the corners of your image.
Macro Photography How To Compose Tip #5 – Perception of Movement

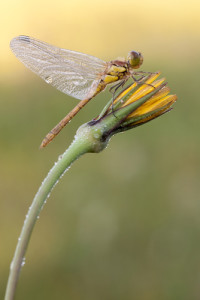
Macro Photography How To Tip #5 – Leave space in front of your object
In macro photography of insects, it is usually ideal to leave some space in front of your subject. Eg. If the dragonfly is flying towards the right, you should leave some space on the right so that it gives the viewer the perception of movement. This space also gives the viewer a glimpse into the world in front of the insect and helps to draw your viewer into your macro photography world.
If you found the macro photography how to guide useful, please share it with all your friends and sign up to our newsletter to receive more macro photography tips!
Recommended Photography Masterclass: