Water Drip Drop Shot Macro Photography Tutorial

 By Nicki Lautemann
I’m obsessed with taking photos of water…
Really and truly obsessed. It started out innocently enough with some raindrops on roses (really it was hostas), and progressed to the point that one day I found myself at the kitchen sink, needing a photo of water! I had more fun in the kitchen that day than I ever thought possible, plus I got some seriously cool shots. The camera can catch some things the eyes can’t, and I think that is just awesome.
As is often true in macro photography, just because you can’t see it, doesn’t mean it isn’t there. When you turn your sink faucet on to a slow dribble–or even steady stream, and you add a cool background, you are setting yourself up to see some amazing things. It doesn’t take much; it’s seriously low tech, and it is awesomely different every single time. Try it. You’ll love it!

You can have this kind of fun in the kitchen too…All you need is something neat-o for the background-or some paper you like-and your sink faucet. The paper can be anything, really—scrapbooking paper, wrapping paper, a colorful folder/notebook, artwork, a bag, fabric, a photo, etc. You get the idea! I find the bolder the better, especially with patterns.
Easy as 1,2,3 – 1) Color/Pattern paper, 2) Camera (Reversed Lens) & 3) Water, Sink and Faucet
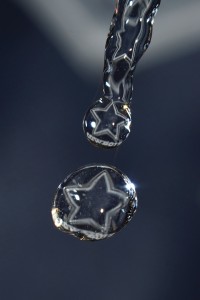
Note: If you are using a photo or want a specific image in your drip, you will need to place the photo upside down…otherwise you will have an upside image in your drip. Also…if you’re using a photo, you may want to put it in a protective sleeve to prevent any possible splashes. And here is a friendly reminder to have a towel handy when attempting your drip drop shot!
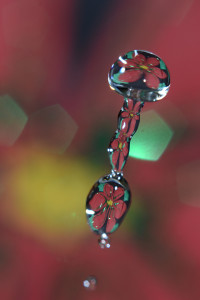
Here are some examples of the backgrounds that I have used previously –
 Background – Reusable Shopping Bag |
 Background – My daughter’s artwork |
 Background – Gift Bag |
 Background – Sticker sheet on black paper |
Background – Hand Towel
Basically, all you have to do is prop up the paper/artwork, etc. behind where the water drips…then turn your faucet on! You’ll need to position yourself based on your lens, but you will want to be able to focus on the water. You may want to use a tripod. I prefer to handhold, as I like to move around and get different points of view and different parts of the drip. My faucet has a removable nozzle, so I also like to take it and play with the angle and the distance between the water and the background. You can get different parts and amounts of the background that way.

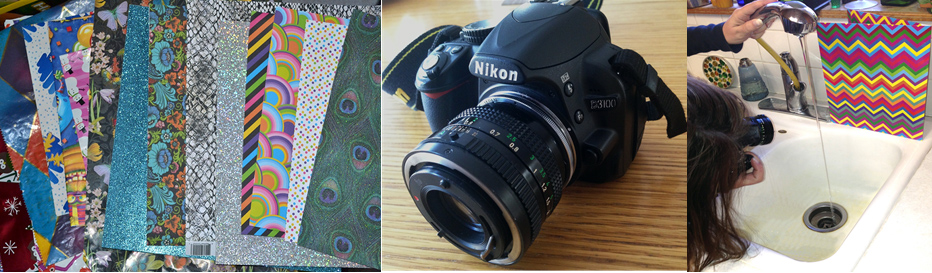
 My macro photography set up is:
- Nikon D3100
- Old Canon prime 50mm in reverse; this puts me about 3 inches from the water
- A towel!
- Manual mode
- The lens is stuck open at f5.6;
- I usually keep my shutter speed at 1/200 and I use my on camera flash set to 1/32 (1/32 of its full power)
- ISO 100 or 200
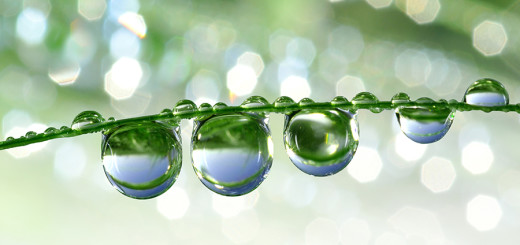
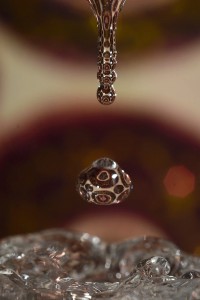
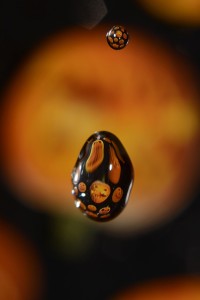
These pics include: a heavy cloth-like craft paper, scrapbook paper, glittered cardstock, craft foam and some plastic beads. You don’t have to limit yourself to 2-D or flat backgrounds.
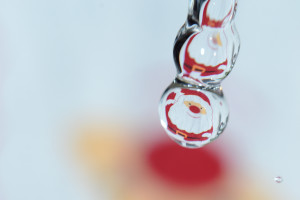
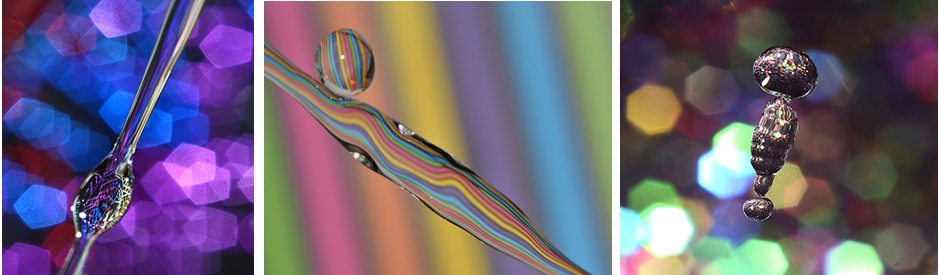
Steady drip, steady slow stream
After you get a feel for it, start to play around with the amount of water—or how “on” you turn the faucet. Try a slow dribble, a small steady stream, a full on stream, or turn it to spray and get a pic of lots of drops all at once! It may not look like there’s a cool drip inside that stream, but try it. Many of these drips were taken with a small steady stream, which looked just like a steady stream – not a fascinating drip drop!
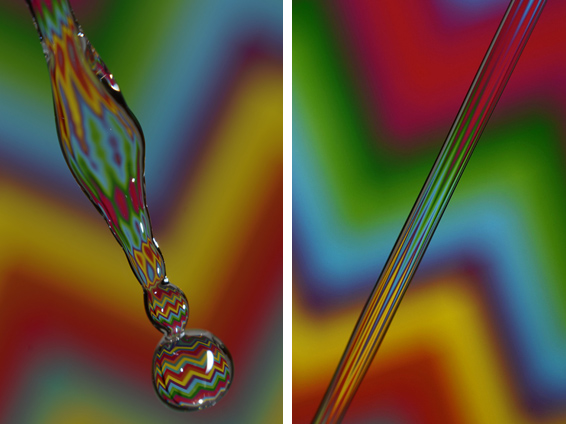
By changing the amount of water coming through the faucet, the resulting photos will change as well, and each way is uniquely wonderful. In these zip zag pics, I’m using a folder for the background. I really like this folder because it offers so many possible outcomes! Even a simple flip adds a fun new perspective.
Note: You will need to play around with timing to determine the best time to ‘click’ the shot.
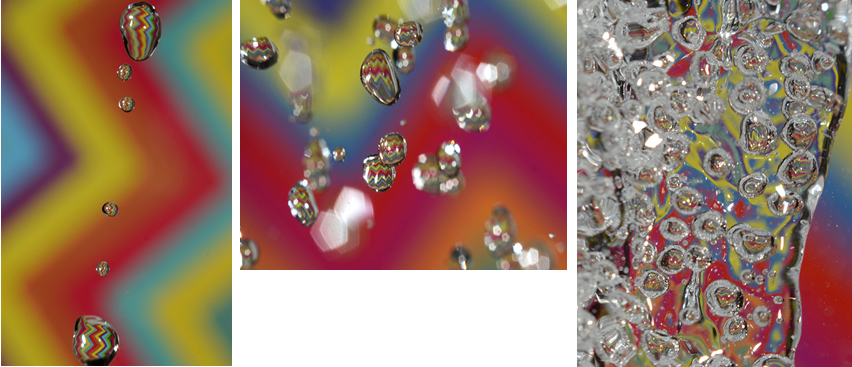
Steady drip with background flipped, steady spray, and full on stream. Check out all those little bubbles in there!
With a little time, you’ll discover your favorite settings on your faucet and you’ll find yourself in all kinds of positions to get a different angle on that drip! You’ll realize you just spent way more time in the kitchen than you’d planned and you didn’t make a single thing to eat! EnJoy!!
Visit my flickr page for more drips and drops and awesome shots: Joy’s Girl
http://www.flickr.com/photos/103815283@N07/sets/72157636088768243/
<Seeing in Macro> You may be interested in learning more about the lens reversal technique that Nicki uses here –
1) Reversed Lens Technique For Macro Photography