Macro Photography – Focus Stacking Tutorial

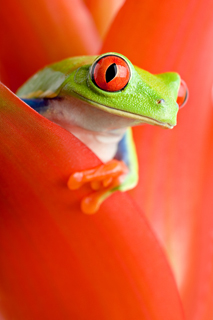
Macro Photography
This macro photography focus stacking tutorial will provide you with the basic focus stacking techniques to achieve tack sharp photos. If you have not read our article on ‘What Is Focus Stacking?’ we highly recommend you to read that first so that you will have a good understanding of what is on focus stacking and the equipment used.
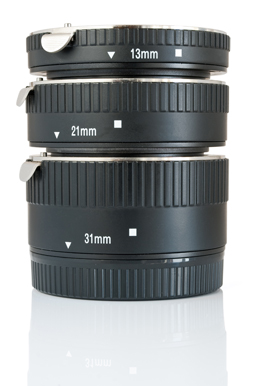
Macro Photography Equipment
- Camera and macro lens
- A good high end tripod
- Focusing rail
- Wired or remote shutter release
- Good lighting (I use three corkscrew 100 watt fluorescents, in three clamp on fixtures. If you do not have access to one, you can use a good flash or strobe with diffuser.)
- Focus stacking software – I used CombinZP (A free download)
Other Equipment
- A good solid table (For your light tent, stage and subject)
- Light tent (For diffusing light) – You may opt for a flash, I don’t use one.
- A stage and specimen holder (This is a place to stage and hold your subject or specimen) – I used a tool called ‘Soldering Helping Hands’ as my stage and specimen holder.
- Color construction paper (For background ambiance)
- Crazy / Super glue
Equipment Setup
Here is how my macro photography focus stacking setup looks like –
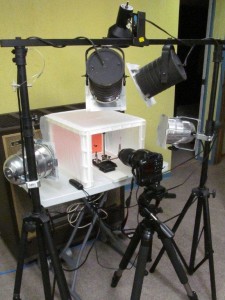
Macro Photography – My Focus Stacking Setup
If you do not have a light tent or external lighting, you could try the following basic bare bones setup. This is a great way to start learning and produces very good results!
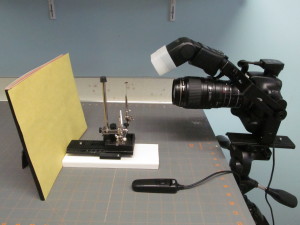
Macro Photography – Basic Focus Stacking Setup
Macro Photography – Basic Focus Stacking (Indoor) Tutorial
For the following tutorial I will be using an insect as my subject.
Step 1. Obtain an insect of your choice in a container and put it in a ‘killing jar’ or use your freezer to do the job. A killing jar is any old jar with a few cotton balls on the bottom absorbed with ethyl acetate also known as Finger nail polish remover. Cover the cotton balls with a round cardboard disk cut to size so your specimen does not become entangled in the cotton. Make sure your jar has a tight fitting lid. Please be aware that there has been a decrease in the bee population this year so please keep this in mind when you are catching your next subject.
Step 2. After a few minutes, you now have your ‘non moving’ insect and it is ready for mounting on the end of thin wire, pin or needle. Put a small dab of crazy / super glue on the end of your needle and stick your needle into it and allow time for glue to set. This may take some practice to get it right. After the glue has set, your specimen is now ready to be put into the specimen holder for staging and photographing.
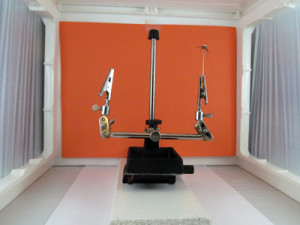
Macro Photography – Focus Stacking Setup
Step 3. It is now time to mount the focusing rail, camera and shutter release to the tripod and prepare for the focus stacking photo shoot!
Step 4. For your camera settings, I recommend an ISO setting of 100 or 200 to keep noise level down and an aperture setting of about f14 for your first try. Once these are set, you can adjust your shutter speed using your exposure meter for proper exposure in the manual mode of your camera. If your camera has it, use the mirror lock up mode as this will reduce vibration.
Step 5. With your camera, focus rail and shutter release mounted, it is time to get everything lined up and straight with your subject. This takes a bit of patience, but must be done! Once you get your subject into your view finder, lock down all knobs on your tripod to reduce movement and vibration. Now, while looking through your view finder, carefully rotate your focus rail knob until you can just start to see the closest part of your subject coming into focus and stop there!
Step 6. We are ready to take your first shot! Holding only your shutter release and not touching the camera or tripod, press the shutter release all the way and wait for the mirror to lock up and wait a few more seconds for vibrations to stop and press the shutter release once more. You have just taken your first shot!
Now, lightly grasping the focus rail knob, rotate the knob just a very small fraction to the next focus area of your subject and repeat the shot. Repeat this step until you have reached all the areas you want in focus and then stop! Here are some examples of the photos that I took – notice how different parts of the wasp is in focus for each shot.
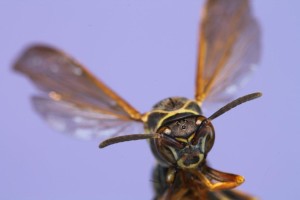
Focus Stacking – Photo #1 (Front in focus)
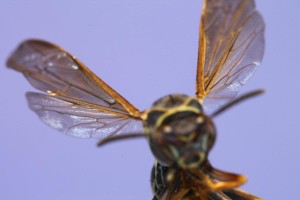
Focus Stacking – Photo #3 (Middle in focus)
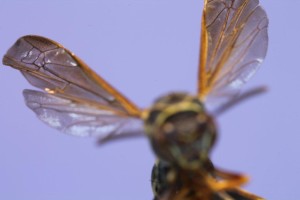
Focus Stacking – Photo #5 (Back in focus)
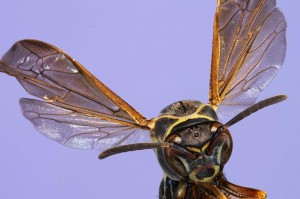
Focus Stacking – Final Combined Photo
Step 7. Take your camera off the tripod and download your photos onto your computer into their own folder. Now we need to open our stacking software and load our photos into the program making sure we load them in the same order as we took them. The first thing we do is Align our photos using the Align functionality. Some focus stacking software will allow you to choose a specific focus stacking mode. Try all the different modes to see which one you prefer most.
That’s it! Save your new focus stacked photo to a folder. With practice, you will develop your own ways of doing things. Remember, only the basics have been shown here to give you some idea how focus stacking is done. There are many different ways to do what was shown here. The most important thing is to have fun and keep learning!
Tips And Advice For Better Stacked Photos
- If you can, set up your studio in the basement with a cement floor to reduce vibrations to your equipment! Vibration is your enemy, and will make your stacks soft!
- For good light positions, the same rules for Portrait photography apply here
- If using a flash or strobe, you may want a light diffuser to soften the light
- Experiment with different types of lighting to find the style that best works for you
- Make sure your camera is aligned with your subject so your framing does not change as you adjust your focusing rail
- Use your mirror lock up function to reduce vibrations when taking a photo
- At higher aperture settings (eg. f16), you can get away with as little as two photos for your stack. This is because of a larger focus area or more depth of field
- At lower aperture settings, (eg. f4), you will require many photos with very, very small adjustments of your focusing rail. This is due of the very shallow depth of field. Some photographers can take as many as 150 or more to achieve the results they want
- Try to keep your ISO low, 100 or 200, to reduce noise in your photos
- If you keep your insects in the freezer, allow them time to warm up and evaporate any moisture off of them before photographing
- Use a magnify glass to inspect your dead insects for dust, dirt and grime that may ruin you photo! If dirt is found, gently clean them off with a fine tip artist paint brush for a much better quality image
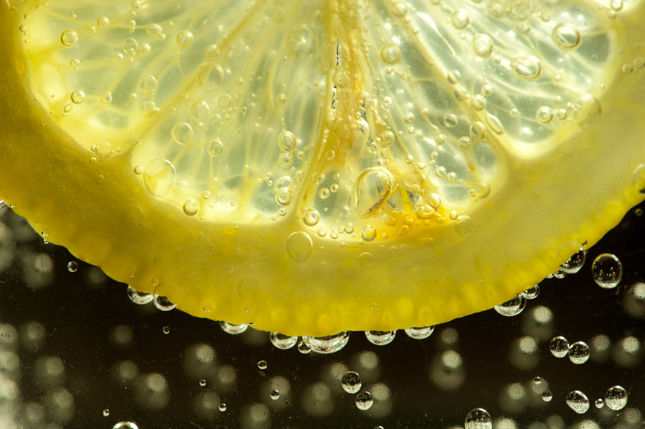
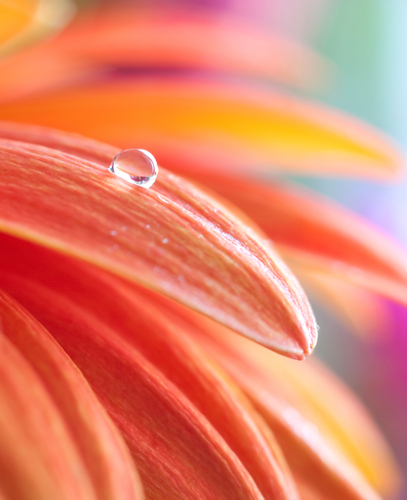
We hope that you found this macro photography tutorial on focus stacking helpful. Remember that this technique can be used on all types of subjects – even flowers! So get out there and start practicing! Good luck and remember to share this secret with your friends and family!
Authors: Eric Vettling & Seeing In Macro, May 2013
A big thank you to our ‘Seeing In Macro’ fan, Eric Vettling for sharing his focus stacking knowledge with the ‘Seeing In Macro’ community.
——————————————————————————————————————————————————–